Ever find yourself struggling with off-target shots or a misaligned sight despite your best efforts? The culprit might not be with your aim! It’s in how your rifle scope was mounted. So… what now?
Today, we’re taking you through the proper steps for mounting rifle scope optics!
Rifle Scopes and Mounting Basics
A rifle scope is a tool that helps shooters see their targets more clearly from a distance. It’s attached to the top of a rifle for better aiming.
The scope lets you zoom in on your target. This makes it easier to hit exactly where you intend.
Picking the right scope for your rifle is the first step. Not all scopes fit all rifles, and the type of shooting you plan to do affects your choice.
If you aim at distant targets, you’ll want a scope that offers a high level of zoom. For closer targets, a scope with less zoom might be better. The key is to match the scope to your shooting needs and the specific rifle you’re using.
When you’re ready to mount your scope, you need a few parts. These include the scope rings, base, leveling kit, and gun stabilizer.
The base is what you attach to your rifle first. It holds the scope rings. These rings are critical because they hold your scope in place. A leveling kit helps make sure your scope is perfectly horizontal.
This is important for accurate shooting. A gun stabilizer holds your rifle still while you work. This makes the job easier and safer.
Tools and Materials Needed
Before you start mounting your rifle scope, make sure you have all the necessary tools and materials. A torque wrench is essential. It helps you apply just the right amount of force when attaching parts.
This prevents damage to your rifle and scope. A screwdriver is also needed for some screws.
A leveling kit is another key tool. It ensures your scope sits perfectly horizontal on your rifle. This is very important for accurate shooting, especially as you adjust the elevation and windage dials.
A gun stabilizer is a must-have because it keeps your rifle still while you work. This makes the whole process smoother and safer.
Materials You’ll Need
Apart from tools, a few materials are required. Scope rings connect your scope to the rifle.
Choosing the right size and type is important. They must fit your scope and the mounting base perfectly. The mounting base is what you attach to your rifle first.
It holds the scope rings and, ultimately, your scope. Sometimes, you might need a thread locker. This is a type of glue that keeps screws from loosening over time. But, be aware that thread locker can act as a lubricant that changes the amount of torque that you are applying.
Securing the Rifle
A gun stabilizer or vise is crucial for keeping your rifle stable while you mount the scope. This not only makes the process easier but also safer. It prevents the rifle from moving unexpectedly.
When your rifle is secure, you can work with both hands-free. This makes it easier to focus on mounting the scope accurately.
Attaching the Base and Rings
Attaching the mounting base to your rifle is the first step in the process. The base is a key part because it holds everything else. You need to place it on the rifle just right.
Make sure it sits flat and fits well. Then, you use screws to attach it securely. It’s important not to over-tighten these screws.
Using a torque wrench helps you apply the right amount of force. This way, you won’t damage your rifle or the base.
Proper Steps for Mounting Rifle Scope Optics
Once the base is on, the next step is to add the scope rings. These rings must match the size of your scope and the mounting base. If they don’t fit perfectly, your scope won’t sit right.
This can make accurate shooting difficult. Place the rings on the base and check their alignment. They should be spaced evenly to give your scope proper support.
When you’re sure the rings are in the right position, tighten them down. Again, a torque wrench is your best friend here. It ensures that you apply just enough force to keep the rings in place without damaging them.
Aligning the Rings
Before you put the scope in the rings, make sure the rings are perfectly aligned. Misaligned rings can twist the scope.
This makes it hard to aim accurately. Some tools can help you check the alignment and make adjustments if needed.
Getting these steps right is important for a well-mounted scope. It ensures your scope is secure and ready for accurate shooting. Taking your time here pays off when you’re out shooting.
Leveling the Scope
Leveling your scope is a key step in making sure you can shoot accurately. If the scope isn’t level, your shots might go off to the side, especially at longer distances.
This happens because the crosshairs in the scope, which you use to aim, won’t be aligned correctly with the target. Making sure the scope is level with your rifle means that when you adjust the elevation (or windage) using the dials or the reticle, your shot will be accurate.
Using a Leveling Kit
A leveling kit is what you use to get this part right. First, you need to make sure your rifle itself is level. You can do this by placing a small spirit level on the rifle’s top, where it’s flat.
Once the rifle is level, you put another level on the scope. These two levels help you see if the scope is parallel to the rifle. You might need to adjust the scope a bit, turning it gently until both levels show that everything is straight.
Checking and Adjusting
After you set the scope in the rings, but before you tighten them all the way, check the levels again. It’s easy for things to shift a little when you’re working. You want to catch any small changes before they become a problem.
Once you’re sure the scope is still level, you can finish tightening the rings. Remember to tighten screws in a criss-cross manner and to use your torque wrench so you don’t overdo it.
Recheck the Leveling
Even after everything seems tight and right, it’s a good idea to double-check the leveling. This might seem like extra work, but it’s worth it. Shooting with a scope that’s even slightly off can be frustrating and might make you miss your target.
Take a bit more time here to make sure your setup is as accurate as possible.
Getting your scope level is all about paying attention to small details. These steps help ensure your scope is perfectly aligned with your rifle, giving you the best chance for accurate shots.
Positioning the Scope
Positioning your scope correctly is as important as having it level. You need to place the scope so that when you look through it, you can see a clear, full view without any dark edges around the sides.
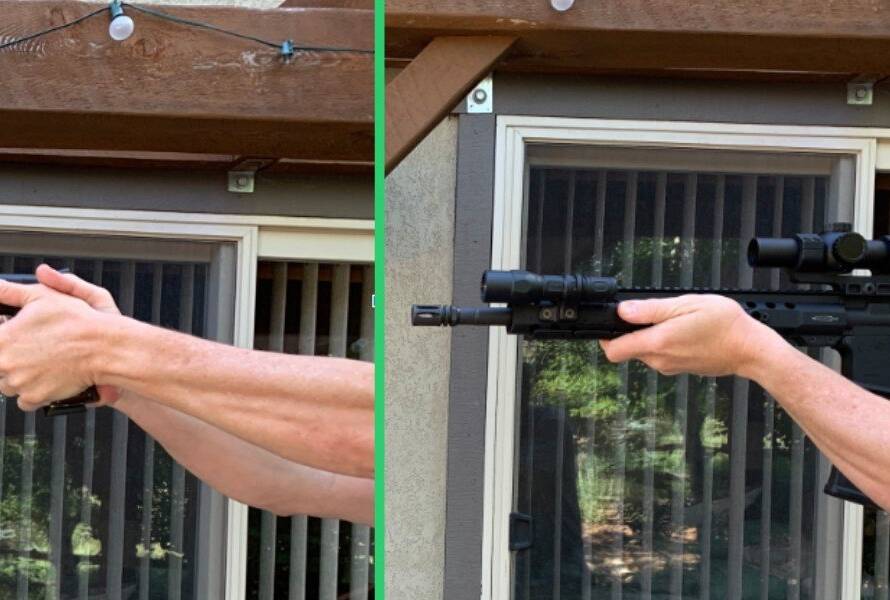
This is called getting the right eye relief. Eye relief is the distance between your eye and the rear lens of the scope when you can see the whole field of view. If the scope is too close or too far from your eye, you won’t see the whole picture, which can make accurate shooting difficult.
Adjusting for Comfort
Comfort is key when positioning your scope. You should be able to hold your rifle naturally without straining to see through the scope.
This means you might have to move the scope back and forth in the rings a bit to find the best spot. The goal is to find a position where you can quickly bring the rifle up to your eye and instantly see a clear image through the scope.
Tightening Down
Once you find that perfect spot, it’s time to tighten the scope in the rings. Doing this right means using your torque wrench again. The manufacturer of your scope and rings should tell you how tight they need to be.
This is important because too much pressure can damage the scope, and not enough can mean the scope might move when you shoot.
Final Adjustments
After everything is tightened down, take a moment to go through all your adjustments again. Check the eye relief and make sure the scope is still positioned comfortably.
Look through the scope one more time to confirm that the view is clear and full.
Safety Checks
Once you’ve positioned and tightened your scope, it’s time for a final check on its alignment. It’s essential to make sure that the scope hasn’t shifted during the tightening process.
A misaligned scope can throw off your accuracy, no matter how well you aim. Look through the scope again to ensure the crosshairs are straight and true.
This step might seem repetitive, but it’s a key part of making sure your setup is as accurate as possible.
Scope Optics for Better Shooting
By following the proper steps for mounting rifle scope optics, you’ll enhance your shooting accuracy and safety. Precision starts with proper setup, leading to improved performance and confidence in every shot.
RKB Armory is run by a lifelong gun enthusiast and Marine Corps veteran. We buy and sell used optics and aim to make the world of firearm accessories easier for you to navigate. Get in touch today to find out how we can help you!